Scanning into Nexxsys
Attachments can scanned into Nexxsys in various areas:
- New RX window
- Rx Detail
- 3rd Party tab
- Attachments tab
Note: Scanned images can also be attached to files within the Group, Drug, Supplier, Doctor and Mixture Folders.
To learn more about scanning into the various areas of Nexxsys, select the dropdowns below.
To scan attachments into the New Rx window:
- From the Workbench, select New. The New Rx window opens.
- Load the document into the scanner top down, face down.
- Choose Single Scan or Duplex Scan, if double sided.

- Review the scan.
- Select Accept.
- Enter the prescription information as usual.
For more information about creating new prescriptions, see New Prescriptions.
To scan attachments in the Rx Detail window:
- In Rx Detail, select Rx > Attachments.
- Load the document into the scanner top down, face down.
- Select Single Scan or Duplex Scan, if double sided button.
- Review the scan.
- Select Accept.
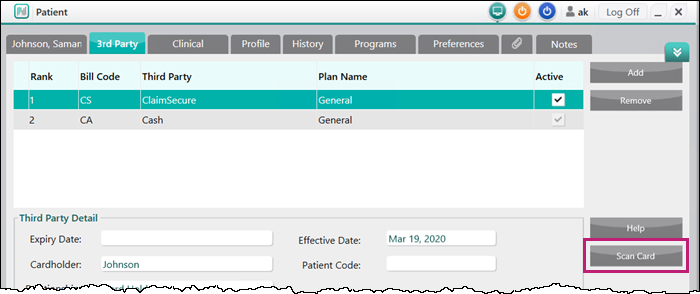
A patient's third party benefit card can be directly scanned into the 3rd Party tab.
To scan a third party benefit card:
- Search for and select the patient.
- Select the 3rd Party tab.
- Highlight the third party plan.
- Load the third party information card into the scanner.
- Select Scan Card.
- The Preview Image window opens.
- Review the scan.
- Select Accept.
- Select Save. The paperclip icon
 appears beside the Rank column indicating a document is attached to the file.
Various documents, such as vacation supply forms, ADR forms, consent forms, can be attached directly to the Patient Folder in the Attachments tab.
To attach forms to the Attachments tab:
- Search for and select the patient.
- Select the Attachments tab (paperclip icon ).
- Load the document into the scanner top down, face down.
- Choose Single Scan or Duplex Scan, if double sided.
- Review the scan.
- Select the appropriate title or type from the Description dropdown.
- Select Accept.
- Select Save. The scanned document displays in the attachment tab with a paperclip icon .
